Contract Information
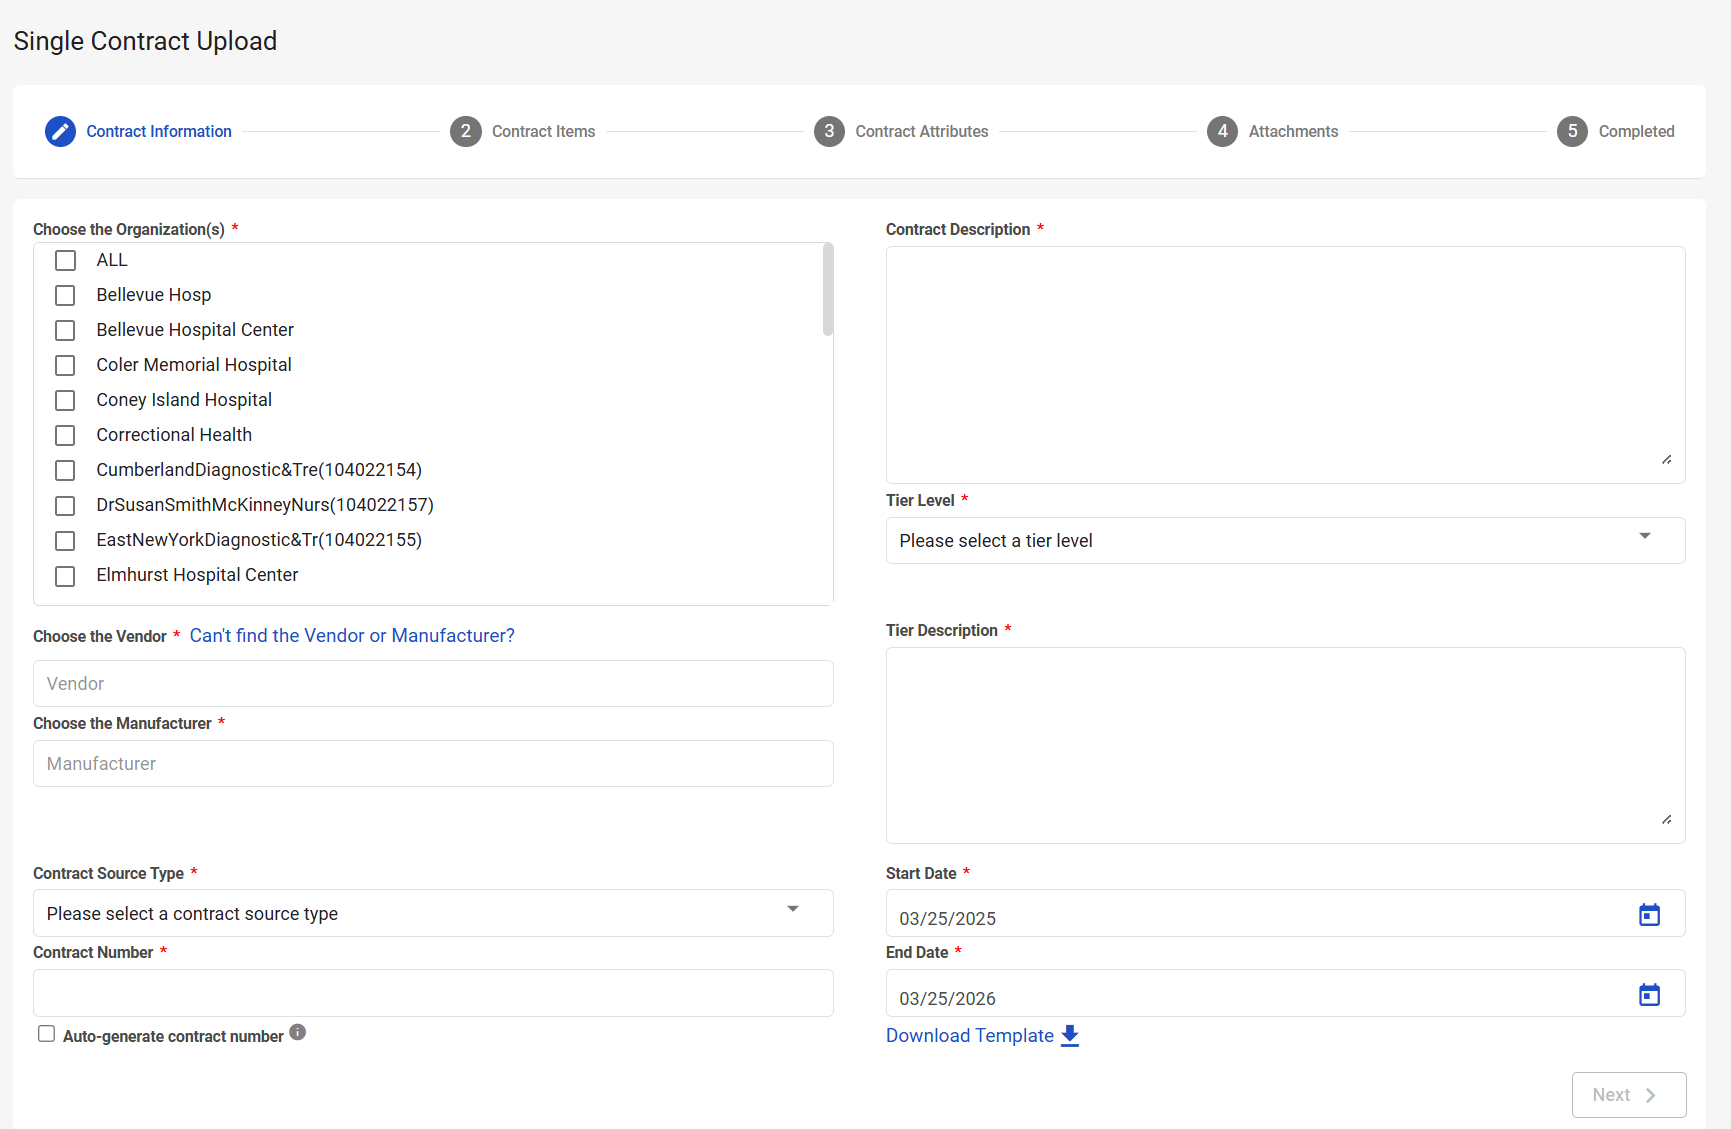
The Contract Information step is the first step in the Single Contract Upload process. In this step, you will identify contract information such as the organization(s), vendor, manufacturer, source type, tier level, and dates associated with the contract. You will also generate the contract number and description.
Navigation
This step appears when you select either:
-
Contract Upload from the left-side navigation pane
-
Contract Upload > Single Contract Upload from the left-side navigation pane
Field Descriptions
The following fields appear during the Contract Information step. Required fields are marked with a red asterisk (*).
|
Field |
Field Description |
|---|---|
|
Choose the Organization(s)* |
Select the organizations this contract will be associated with. |
|
Choose the Vendor* |
Select the vendor this contract will be associated with. If you don’t see the vendor you need, select Can’t find the Vendor or Manufacturer? The Supplier Setup Request window appears so you can enter vendor information. Once you submit the vendor information, a Support ticket is created so that the vendor can be reviewed and added to the list. |
|
Choose the Manufacturer* |
Select the manufacturer this contract will be associated with. If you don’t see the manufacturer you need, select Can’t find the Vendor or Manufacturer? The Supplier Setup Request window appears so you can enter manufacturer information. Once you submit the manufacturer information, a Support ticket is created so that the manufacturer can be reviewed and added to the list. |
|
Contract Source Type* |
Select the contract source type. The source type options are:
Note: The different versions of local source types are merely provided to offer your organization different ways to categorize your local contracts. The terms have no inherent meaning or definition to CCXpert; they simply provide more flexibility in ranking local contracts in the Price Validation Hierarchy. It is acceptable to have all of your contracts sourced as “Local,” for instance. But if you have the same items on multiple locally negotiated contracts, you may need to use different source types to rank their pricing differently in the hierarchy.
|
|
Contract Number |
Enter the contract number. You can type this number manually or select Auto-generate contract number. If you select Auto-generate contract number, the application will automatically increment the last loaded contract number by 1. For instance, if the last contract number loaded was 13487, the system will create contract 13488. If the last contract loaded was Masks, the system will create contract number Masks1. |
|
Contract Description* |
Enter a contract description. There is an 80 character limit. |
|
Tier Level* |
Select the tier level.
|
|
Tier Description* |
Enter a tier description. There is a 1500 character limit. |
|
Start Date* |
Enter the contract start date or use the date picker to select the contract start date. This date defaults to the current date. |
|
End Date* |
Enter the contract end date or use the date picker to select the contract end date. This date defaults to one year from the current date. |
|
Download Template |
Select to download the Contract Items Template. This template is used to bulk upload items that will be associated with the contract. This template will be uploaded to CCXpert during the Contract Items step of the Single Contract Upload process. |
|
Next |
Select to advance to the next step in the Single Contract Upload process. |
Supplier Setup Request Window
If you cannot locate the necessary vendor or manufacturer, you can create a new vendor or manufacturer directly from the Contract Information step. Select Can’t find the Vendor or Manufacturer? to open the Supplier Setup Request window. Then, enter the necessary information. Once you submit the vendor or manufacturer information, a Support ticket is created so that the vendor/manufacturer can be reviewed and added to the list.
Required fields are marked with a red asterisk (*).
|
Field |
Field Description |
|---|---|
|
Supplier* |
Enter the vendor/manufacturer name. |
|
Address1* |
Enter the vendor/manufacturer address. |
|
Address2 |
Enter the vendor/manufacturer address. |
|
City* |
Enter the city associated with the address. |
|
State* |
Enter the state associated with the address. |
|
Message* |
Enter any additional information you would like to provide with the new vendor/manufacturer request. This information becomes the body of the email/ticket sent to Support. |
|
Zip Code* |
Enter the zip code associated with the address. |
|
Save |
Select to save the new vendor/manufacturer. |
|
Cancel |
Select to cancel the new vendor/manufacturer creation. |