Contract Items
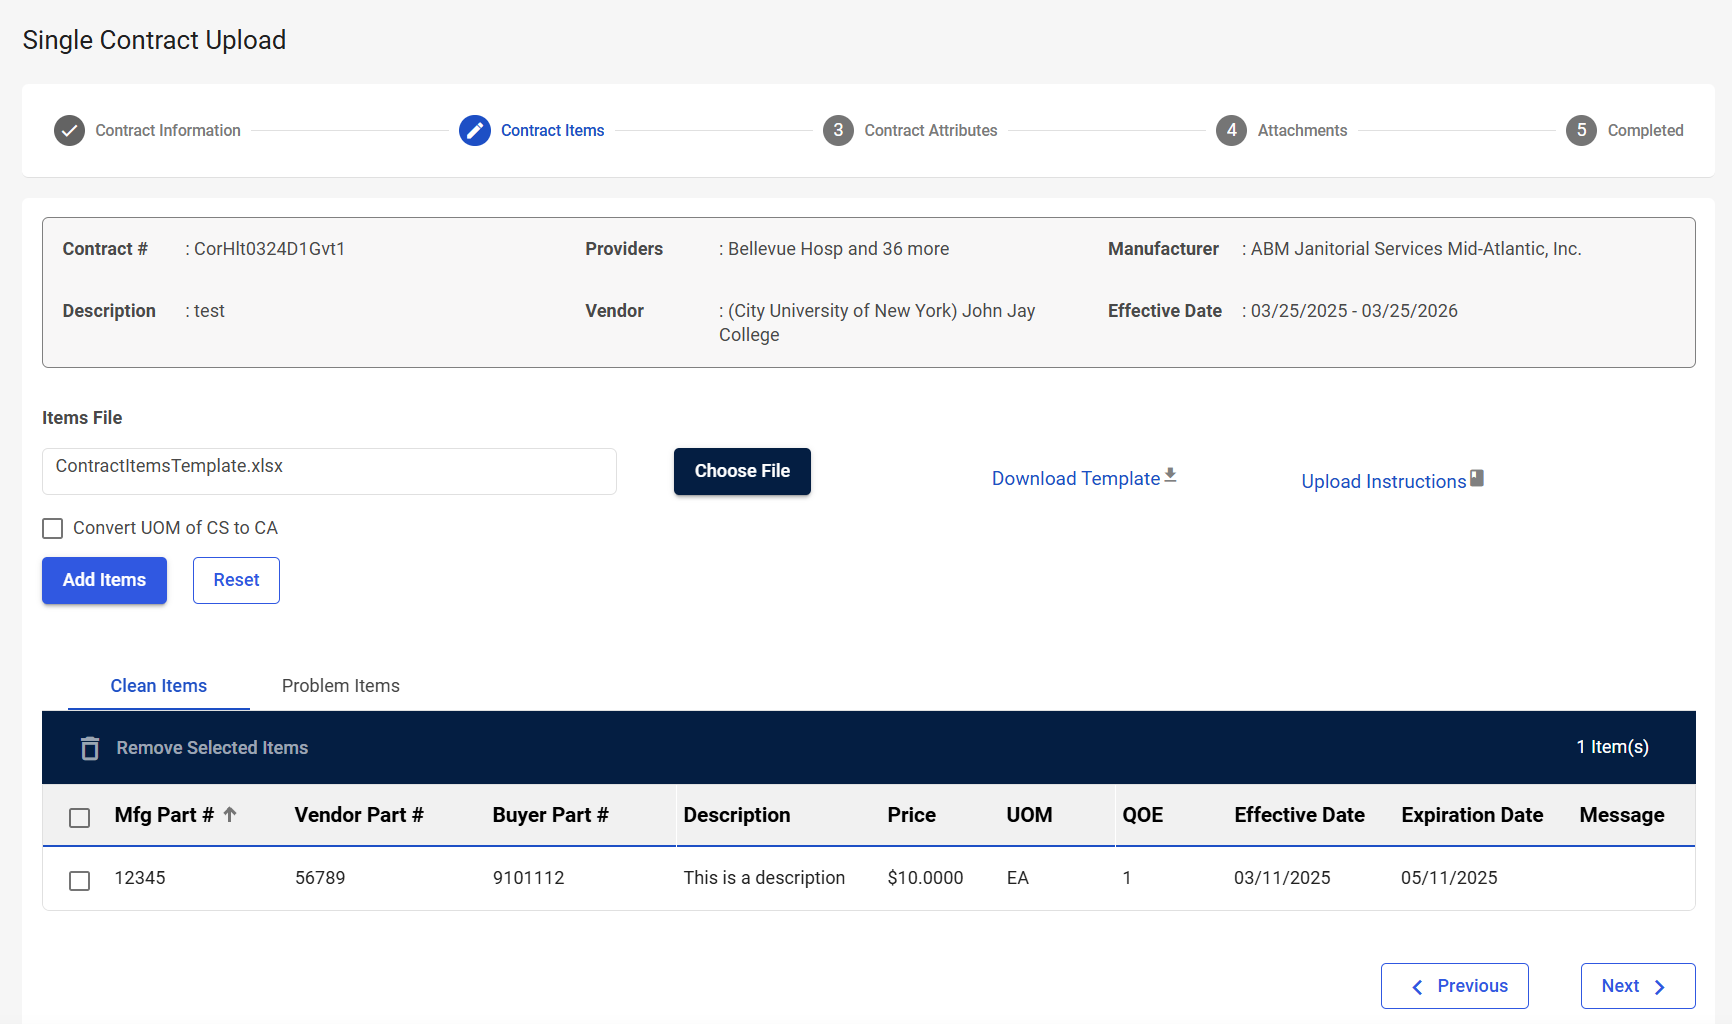
The Contract Items step is the second step in the Single Contract Upload process. In this step, you will upload the Contract Items Template that contains the items you want to associate with the contract.
Navigation
This step appears when you select Next on the Contract Information step.
Field Descriptions
The following fields appear during the Contract Items step.
|
Field |
Field Description |
|---|---|
|
Contract Information |
|
|
Contract # |
Displays the contract number. |
|
Providers |
Displays the providers associated with the contract. |
|
Manufacturer |
Displays the manufacturer associated with the contract. |
|
Description |
Displays the contract description. |
|
Vendor |
Displays the vendor associated with the contract. |
|
Effective Date |
Displays the contract start and end date. |
|
Contract Items Upload |
|
|
Items File |
Select Choose File to upload the completed Contract Items Template. |
|
Download Template |
Select to download the Contract Items Template. This template is used to bulk upload new items that will be associated with the contract. Note: You may have already downloaded the template in the previous Contract Information step.
|
|
Upload Instructions |
Select to view instructions on how to upload the Contract Items Template. |
|
Convert UOM of CS to CA |
Select to automatically convert the cassette (CS) unit of measure to case (CA). Note: GHX uses the ANSI standard, CA, but supports both CS (Cassette) and CA (Case). The system is hard-coded to see both CA and CS as Case so that they are correctly validated, regardless of which is received on an 850/855/810. This allows you to change the file from CS to CA, if needed for your system’s purposes.
|
|
Add Items |
Select to add items to the contract after uploading the Contract Items Template. |
|
Reset |
Select to remove the selected Contract Items Template. This is useful if you selected the wrong file or an error occurs. |
|
Contract Items Table – Clean Items and Problem Items |
|
|
Remove Selected Items |
Select to remove specific items from the contract. This will remove any items that have been selected via the Select checkbox. |
|
Select checkbox |
Select items to remove them from the contract. |
|
Mfg Part # |
Displays the item’s manufacturer part number. |
|
Vendor Part # |
Displays the item’s vendor part number. |
|
Buyer Part # |
Displays the item’s buyer part number. |
|
Description |
Displays the item description. |
|
Price |
Displays the item’s price. |
|
UOM |
Displays the item’s unit of measure. |
|
Quantity |
Displays the item’s quantity. |
|
Effective Date |
Displays the date the item becomes effective on the contact. This date must be within the Start and End Date of the contact header. |
|
Expiration Date |
Displays the date the item expires on the contract. This date must be within the Start and End Date of the contact header. |
|
Navigation Buttons |
|
|
Previous |
Select to return to the previous step in the Single Contract Upload process. |
|
Next |
Select to advance to the next step in the Single Contract Upload process. |