Description Management: Abbreviations
Customer Admin users can manage two different abbreviation lists used in GHX item descriptions. Abbreviations are often used in item descriptions to shorten their length.
For example, the abbreviation for the term “dressing” might be defined as “DRS.” You can manually add or edit an abbreviation, or you can upload a list of abbreviations in bulk. Abbreviation activity is available on the Upload History tab.
Tip: There is a count of the number of occurrences the descriptor is found in the GHX Description for items, and a descriptor character length that will help prioritize which items could be defined with an abbreviation.
GHX provides the descriptor for the GHX descriptions. When you modify the abbreviations associated to the descriptor, GHX will apply the changes to the GHX item description in Data Connect. You can export the descriptors and abbreviations, when needed. When uploading, descriptors must be an exact match, but capitalization case is ignored.
Note: You can use this process to modify only GHX item descriptions. You cannot modify manufacturer descriptions.
Manually Edit Abbreviations
-
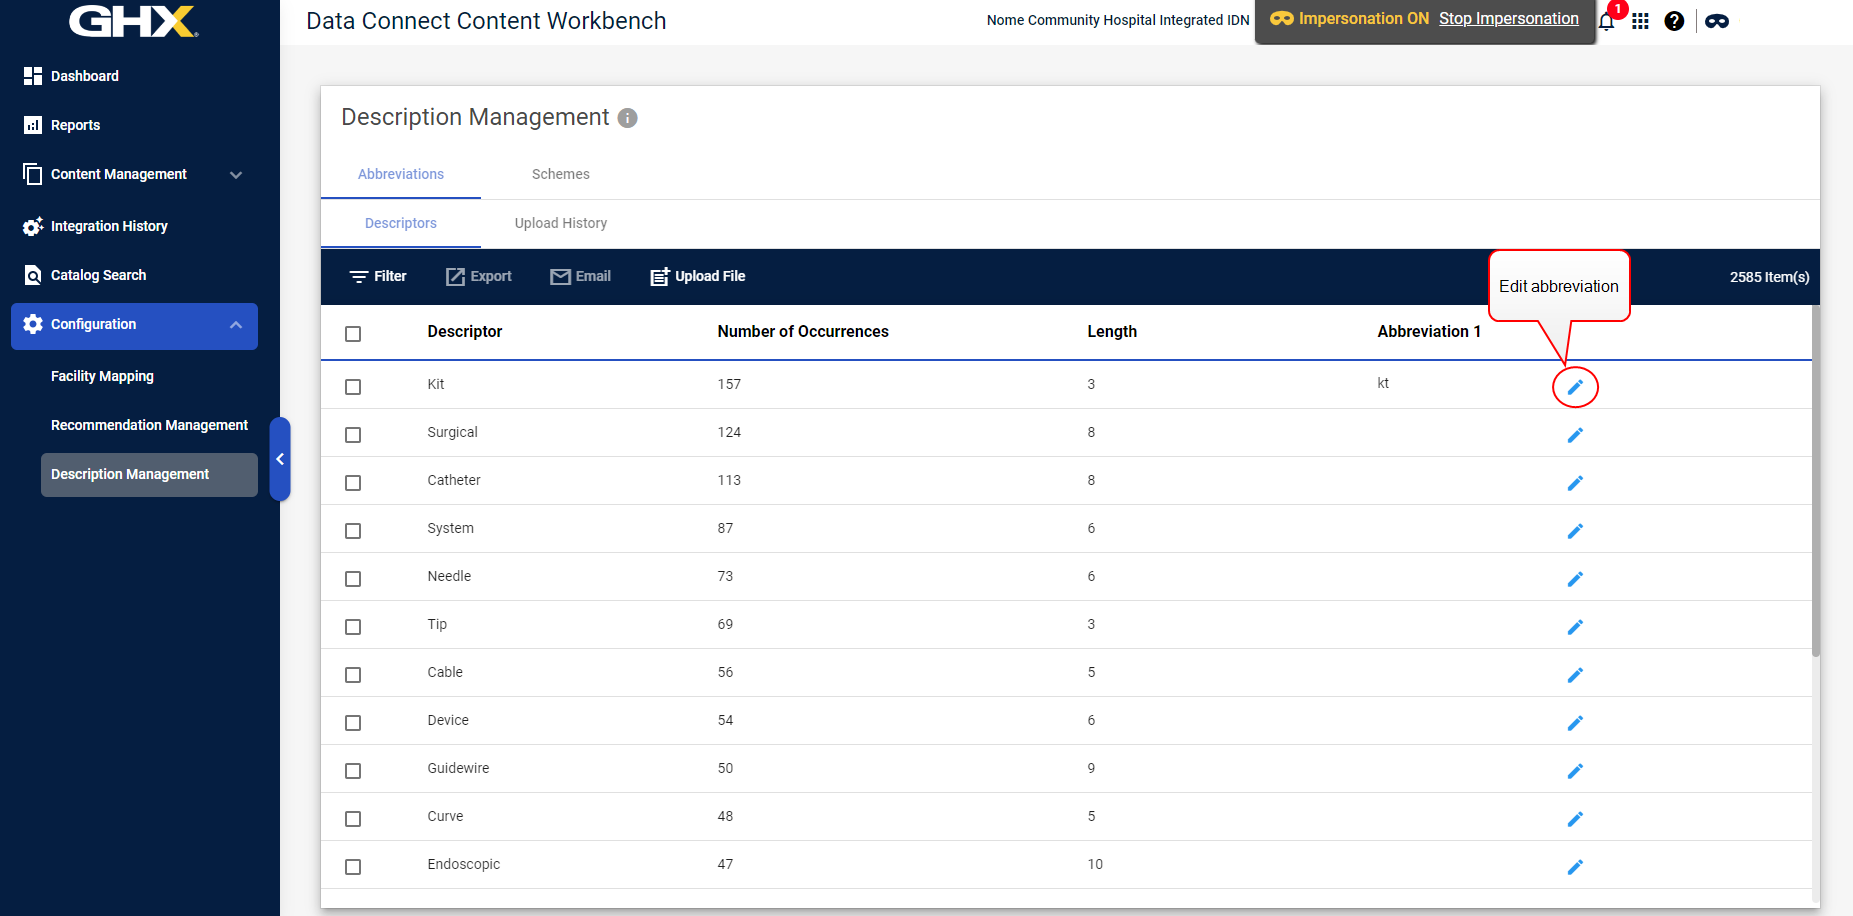
Go to Configuration > Description Management. The Description Management page opens to the Abbreviations tab.
Note: This grid contains a list of words (descriptors), the number of occurrences of each word, and the character length of each word.
-
Identify the desired descriptor and select
 Edit in the Abbreviation column.
-
Modify the abbreviation using the following rules:
- The maximum length of a descriptor is 20 characters.
- Descriptors cannot include special characters.
-
Select
 Save.
Save.
Upload Abbreviations in Bulk
Best Practice: To make changes to the abbreviations, export the existing list to Excel, modify the downloaded file, and then upload the updated file into your system.
Important: Before creating abbreviations in bulk:
-
Only one abbreviation list is applied to all schemes.
-
During description generation, the abbreviation is applied first and then characters are truncated per the specified length.
-
Understand the difference between Overwrite and Update:
-
Overwrite - This option replaces the entire abbreviation list with the list in the uploaded file. To prevent data loss, the uploaded file must contain the same descriptors that are stored in Data Connect. The process will fail If the list does not contain the same descriptors.
-
Update - This option modifies the existing abbreviations with the abbreviations found in the uploaded file.
-
-
In Configuration, Description Management, select the Abbreviations tab.
-
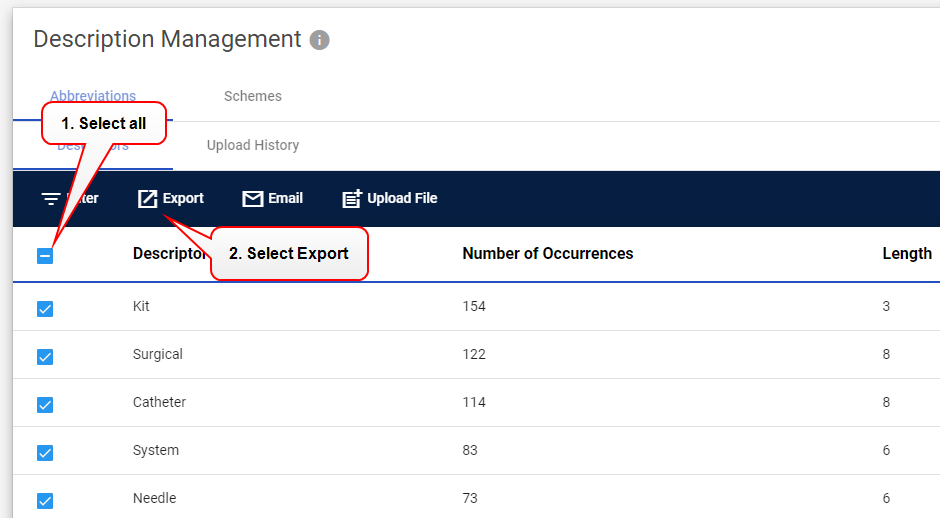
Select all the Descriptors and then select Export. An abbreviations file will be downloaded to your default directory.

-
Modify the downloaded file with your desired abbreviations in the Abbreviation column. Save the file.
-
Select Upload file. A wizard opens.
-
Select which list (you can have up to two) will be updated in the Choose Abbreviation List field.
-
Select Browse.
-
Locate and select the Excel file.
-
Select Upload File.
-
Select Next.
-
Select the Select Descriptor field and select the appropriate column.
-
Select the Select Abbreviation field and select the appropriate column.
-
Select Overwrite to replace the existing list with the new one, or choose Update to add the new abbreviations to the existing list. Remember:
-
Overwrite: This option replaces the entire abbreviation list with the list in the uploaded file. To prevent data loss, the uploaded file must contain the same descriptors that are stored in Data Connect. The process will fail If the list does not contain the same descriptors.
-
Update: This option modifies the existing abbreviations with the abbreviations found in the uploaded file.
-
-
Select Finish.
View Abbreviation Upload History
-
Select the Upload History tab. The tab shows the previous 30 days of activity.
-
View the job status. Options are:
-
Completed
-
In Progress
-
Queued
-
Upload Exception
-
-
Select the Exception Count link. The Exception list opens.
-
View the descriptor, abbreviation, and exception reason. Exceptions reasons are:
-
Missing descriptor in uploaded list: if even one exception exists, the job stops, no data is updated, and an “Upload Error” status is applied to the job.
-
Abbreviation length exceeds 20 characters: if even one exception exists, the job stops, no data is updated, and an “Upload Error” status is applied to the job.
-
Descriptor not found in GHX word or descriptor list: GHX completes the upload, updates the data, and applies a “Completed” status.
-
-
Data Connect downloads the descriptors in the uploaded Excel file that did not match the GHX descriptors.