Create Custom System Routing Rules
Defining custom routing rules decreases manual intervention on common invoices. A routing rule is a conditional statement or statements of specific criteria. If invoices meet the rule's criteria, they're automatically routed to the specified state, user, or your ERP.
Tip: don't create a custom system routing rule with more than four conditions. If you need more conditions, consider creating a separate routing rule to accommodate the other conditions.
- Click the Admin tab.
- Click the Custom System Routing link. The Custom System Routing page opens.
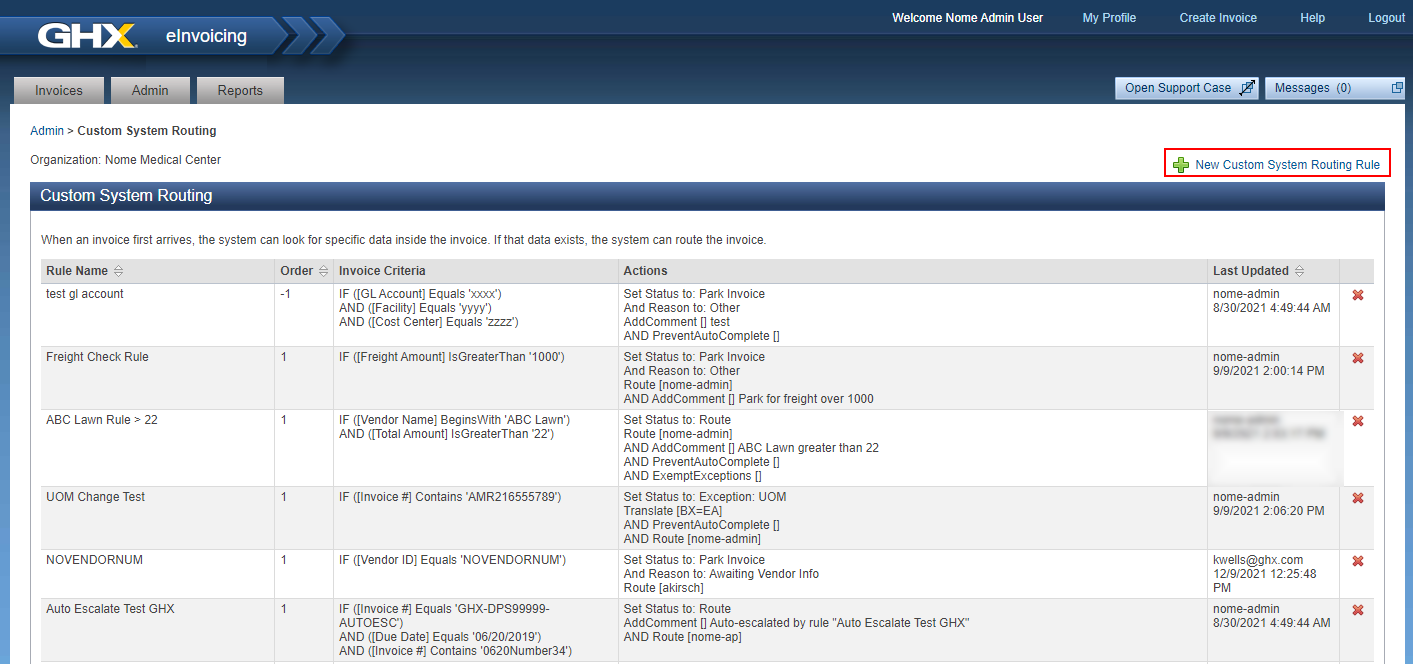
- Click the New Custom System Routing Rule button. The Edit Custom System Routing Rule page opens.
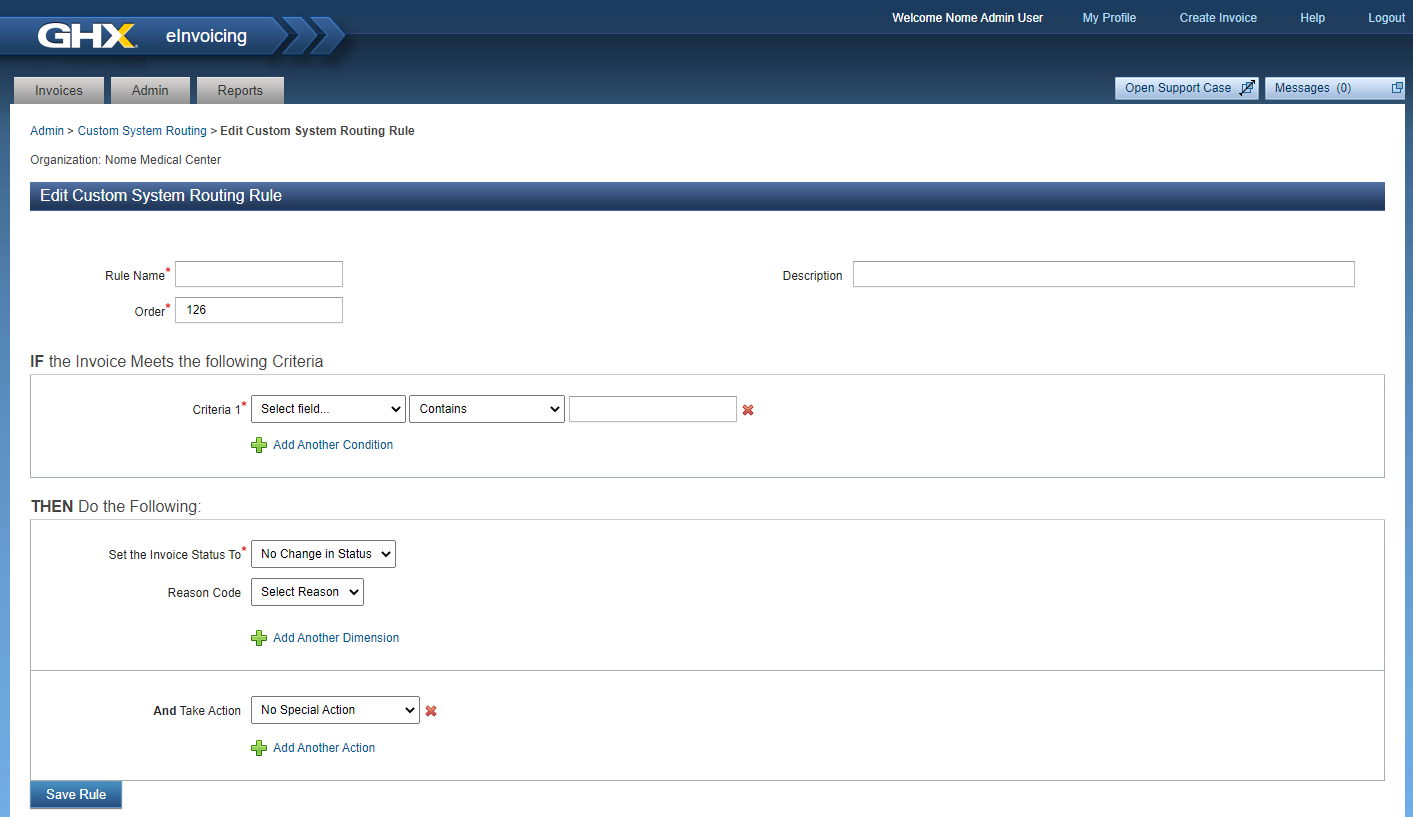
- Type a name for the rule in the Rule Name field.
- Complete the IF the Invoice Meets the following Criteria statement by selecting a value from the Select field and Contains lists, or by typing the appropriate value in the fields.
Tip: When setting up rules with multiple values, numbers or letters must be separated with commas (1, 2, 3) or with cashes (A-C).
Example rule criteria:
- Criteria 1: Vendor Name + Equals + Smith Medical
- And Criteria 2: Total Amount + IsBetween + 200 and 300
- And Criteria 3: PO Amount + IsWithin + -5 and 5 % of Total Amount
- Complete the THEN Do the Following statement by selecting a value from the Set the Invoice Status To list.
The available options are:
- No Change in Status: Routes the invoice without changing the status
- Park Invoice
- Release to ERP
- Cancel Invoice
- Route
- Exception: Item #
- Exception: Line #
- Exception: Price
- Exception: UOM
Note: If you select the Cancel Invoice status, you must also select a Reason Code from the list.
- Complete the And Take Action statement by selecting one of the options.
The available options are:
- No Special Action
- Add Remark: Select to add a comment to the rule
- Route to: Type the user name of the person to whom the invoice should be routed; select the Escalate Unapprovable checkbox to automatically move the invoice through the workflow until it reaches a manager or approver who has the appropriate approval limit
- Translate UOM: Select to change one unit of measure (UOM) value to another value; this change can occur globally or for only a specific vendor
- Prevent Auto Release: Select to stop the auto-release action for specific invoice types
- Exempt from Exceptions: Select to exempt exceptions for specific invoice types
Examples: Auto-escalation examples are a custom routing rule that targets all non-PO invoices and applies auto escalation, a more generic custom routing rule that applies to all invoices and applies auto escalation, and a more specific custom routing rule that targets a specific vendor and applies auto escalation.
Tip: Click the
 icon to remove this criteria.
 - Click the Add Another Action link to add more criteria, if needed.
- Click Save Rule.
Export Custom Routing Rules
To easily create, edit, and manage custom routing rules in bulk, you can export your current routing rules from the application.
To export custom routing rules:
- Select the Admin tab.
- Select the Custom System Routing link. The Custom System Routing page opens.
-
Scroll to the bottom of the page, and select Export. The custom routing rules are downloaded to your computer as a CSV file.