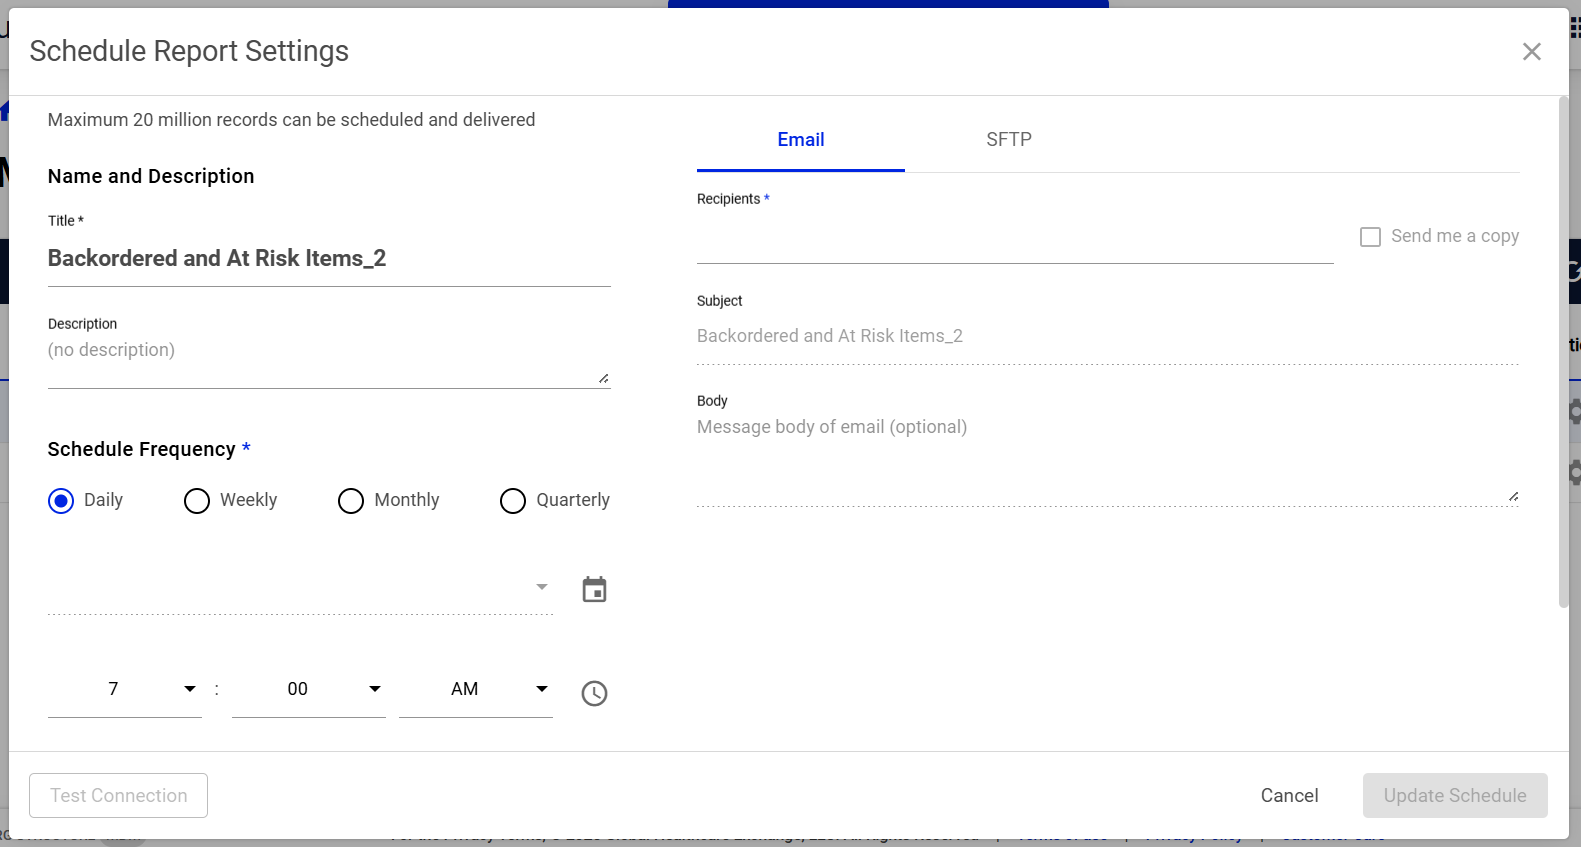
Schedule Report Settings Window
Scheduled reports are designed to automate the delivery of saved data, providing timely access to essential information at daily, weekly, monthly, or quarterly intervals. Users can manage these settings via the Manage Settings option under the Actions column on the My Reports screen, allowing customization of scheduling parameters and report content. Notifications about report availability are sent through email, and reports can be downloaded from the cloud or accessed securely via SFTP, ensuring seamless integration into existing workflows. Covering up to the most recent two years of data, these reports offer comprehensive insights for informed decision-making. This feature enhances operational efficiency by reducing manual effort, improving data security, and supporting data-driven strategies.
Navigation
The Schedule Reports Setting window appears when you select Actions > Manage Settings on the My Reports screen. This screen appears when you select Resiliency Center > My Reports from the left-side navigation pane.
Field Descriptions
The following fields appear on the Schedule Report Settings window. Required fields are marked with an asterisk (*).

| Field | Field Description |
|---|---|
| Title* | Displays the name of the report or task. This field can be edited. |
| Description | Displays a brief explanation of the report. This field can be edited. |
| Scheduled Frequency* | Indicates whether the report is scheduled to run daily, weekly, monthly, or quarterly. |
| Data Format* |
Indicate which file type the report should be sent in. The available options are:
|
|
|
|
| Recipients* |
Enter the email address of the users who will receive the report. Select Send me a copy to send a copy of the report to the logged in user. |
|
Subject* |
Enter the email notification subject line. |
| Body | Enter the body of the email notification. |
|
SFTP |
|
| SFTP Host* | Enter the server address for file transfer. |
|
SFTP Port |
Enter the network port for SFTP. |
| Target Directory | Enter the folder path on SFTP server. |
|
User Name |
Enter the SFTP access username. |
| Password | Enter the SFTP access password. |
|
Compress file as zip |
Select to send the report as a compressed zip file. |
| Notify me by email on upload success/failure |
Select to receive an email notification of successful and failed data transfers. |
|
Buttons |
|
| Test Connection | Select to test the email addresses or SFTP connection. This is optional |
|
Cancel |
Select to cancel any schedule setting changes and close the Schedule Report Settings window. |
| Update Schedule | Select to save your schedule setting changes. |