Schedule Reports
You can schedule saved reports to be automatically delivered on a daily, weekly, monthly, or quarterly basis. Notices of report availability will be sent by email. Reports are available for download from the cloud or through Secure File Transfer Protocol (SFTP). These scheduled reports can include up to the most recent two years of data.
See Export Reports if you need to create a one-time report for up to the most recent 90 days of data.
-
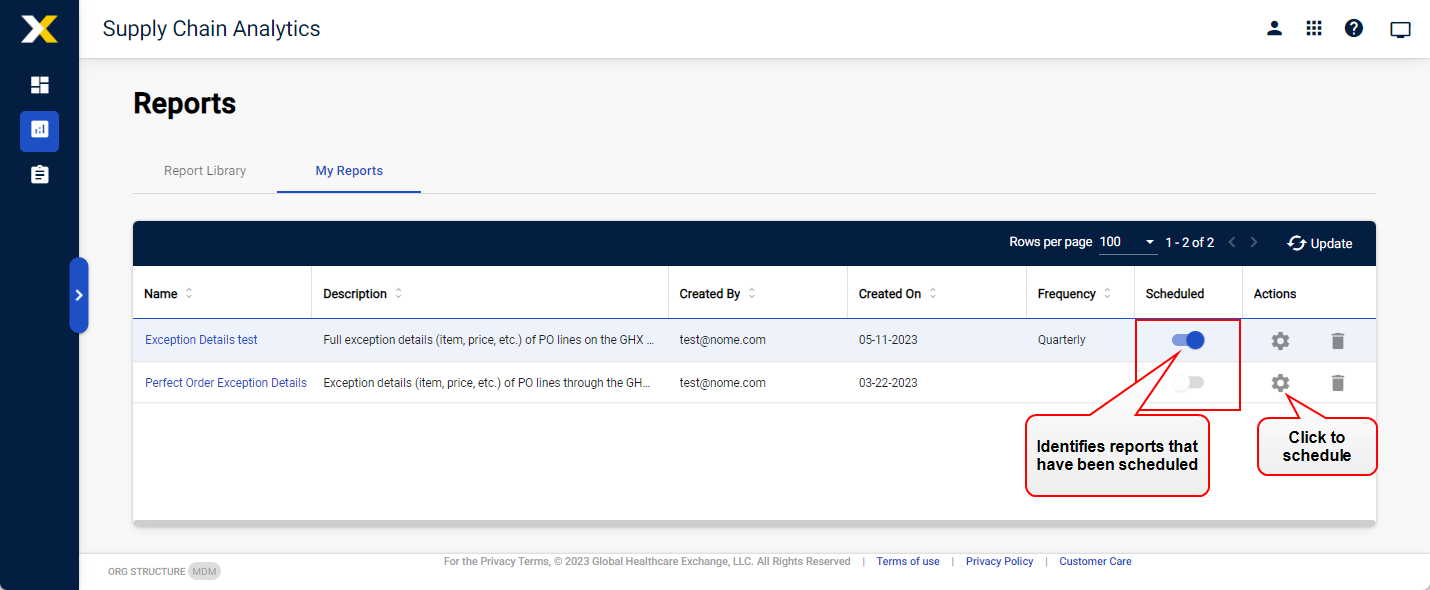
Select Reports > My Reports. The My Reports page opens.
-
Locate the report you would like to schedule.
-
Tip: The Cancel button does not cancel the scheduled report. It closes the dialog box.
-
Edit the report Title and Description, if needed (optional).
-
Select the Schedule Frequency. This indicates how often and when you want to receive this report. The available schedule frequency options are:
-
Daily
-
Weekly
-
Monthly
-
Quarterly
Tips: When scheduling a daily report, be sure to schedule the report after 7:00 AM (MST) to ensure you receive the previous day's data. -
-
Indicate which Data Format the report should be sent in. The available options are:
-
Comma Separated (.csv)
-
Tab Delimited (.txt)
-
Pipe Delimited (.txt)
-
-
Select Emailor SFTP to define delivery details.
Note: Required fields are marked with an asterisk (*) in the application.-
If you selected Email:
-
Enter the email address of the users who will receive the report in the Recipients field.
-
Select Send me a copy if you also want to receive a copy of the report. This is optional.
-
Enter the email notification Subject line.
-
Enter the Body of the email notification. This is optional.
-
-
If you selected SFTP:
-
Enter the SFTP Host.
-
Enter the SFTP Port. This is optional.
-
Enter the Target directory. This is optional.
-
Enter the SFTP Username. This is optional.
-
Enter the SFTP Password. This is optional.
-
Select Compress file as zip to send the report as a compressed zip file. This is optional.
-
Select Notify me by email on upload success/failure to receive an email notification of successful and failed data transfers. This is optional.
-
-
-
Select Test Connection if you would like to test the email addresses or SFTP connection. This is optional.
-
Select Update Schedule. The report schedule is saved.
Saved Report Frequency and Schedule Frequency
The Schedule Frequency setting on the My Reports screen should correlate to the frequency in the saved report. If the report data and the schedule are not correlated, the data on the resulting report may be confusing. The following examples describe how to ensure these frequencies are aligned.
Example: Quarterly – You open the PO Details report, select a Date/Time column header to open Advanced filtering, select Last Quarter, and select Apply. When setting up the scheduling for this saved report you select the Quarterly option. In this case, GHX sends the report on the first day of the new quarter.
Example: Weekly – You open the POA Details report, select a Date/Time column header to open Advanced filtering, select Last 7 Days, and select Apply. When setting up the scheduling for this saved report you select the Weekly option and select the day of the week when you want the report delivered. In this case, GHX sends the report on the selected day of the week with data from the previous seven days.