Submit Your Requisition
Once you have added all of your items, your requisition needs some work before it can be submitted:
- Click the Shopping Cart
 icon at the top of the page.

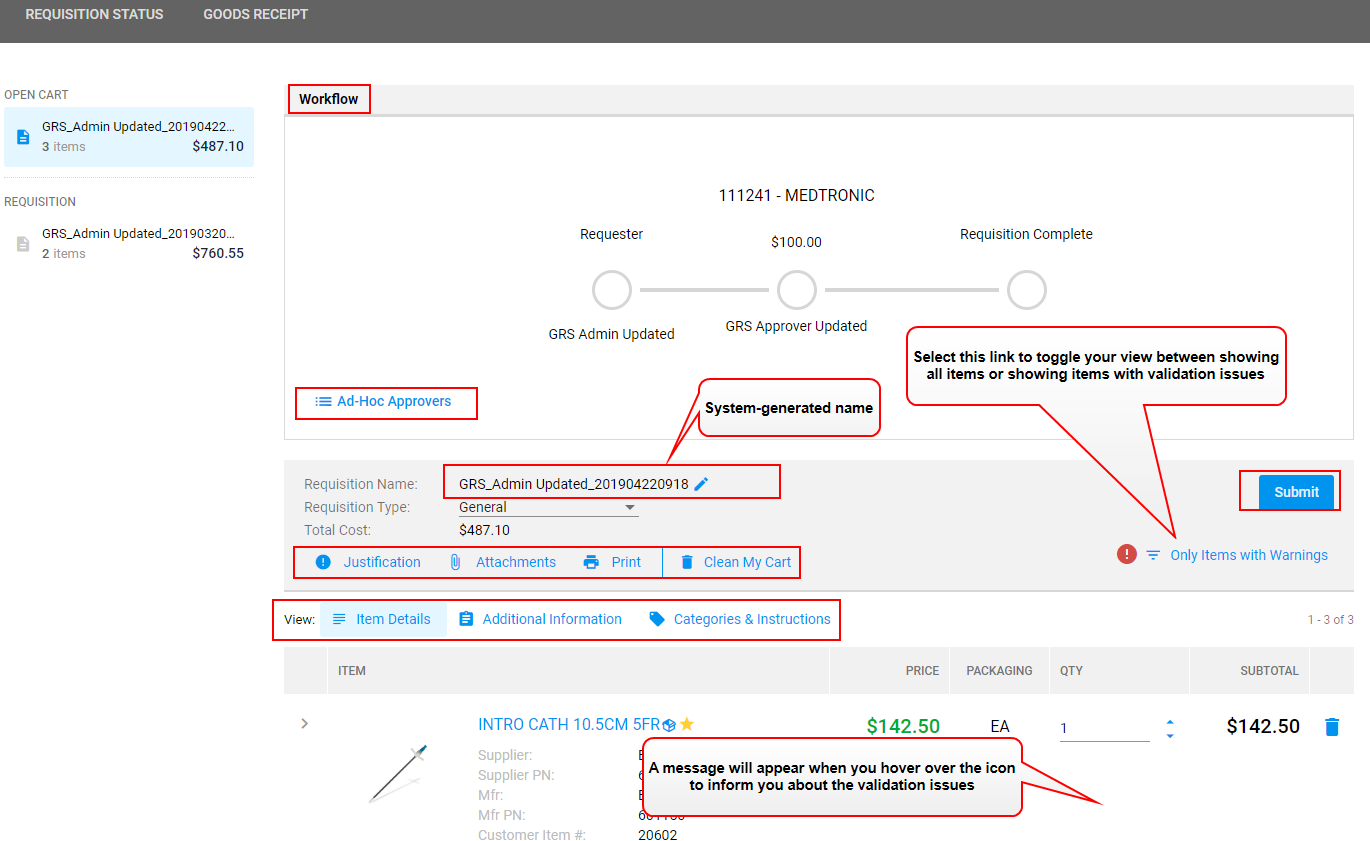
- Review the requisition workflow and decide if you would like to include any Ad Hoc approvers.
- Click
 to edit the system-generated requisition name. Changing the requisition name will make it easier to find and reference your requisition.
Note: GHX highly recommends changing the requisition name and your organization may even require it.
- Check the box if this requisition needs to go through the Stat workflow.
Note: Stat in GHX Procure Requisition Manager does not mean "immediately". It means that if your organization has set up Stat, your requisition will be routed through an abbreviated workflow.
- To add a justification, click
 to open a justification field.
Note: Never enter or attach any Protected Health Information (PHI) to a requisition.
- To add an attachment,
- Click
 to open attachment functionality.
 - Click Upload Attachment.
- Navigate to the desired file and click Open.
- To print the requisition, click
 to open the print functionality.
 - Review the Item Details. Look for the warning
 icon. If you see the icon, scroll over it to find the validation issue.
 - Use the Case Information and Categories & Instructions links to enter information that will clear the validation issues.
- Click Add Item to return to Search for and Add Items.
- Once all your validation issues are cleared, the Submit button will become available. Click it to submit your requisition to the approval workflow. If necessary, the requisition may 'split' based on vendor.
Note: You may need to hit Clear View to see your requisition listed on the Requisition Status page. If you still do not see it, you may need to expand the time period. (The default time period is 7 Days.)