Register a New Account for a New Buyer
When you register new accounts, you are (1) associating an account number to a location and (2) associating a buyer that can transact documents through the Exchange (for example, purchase orders). You must register new accounts individually.
You can register a new account for an existing buyer or for a new buyer. Use the steps below to register a new buyer. See Register a New Account for an Existing Buyer to register an existing buyer.
-
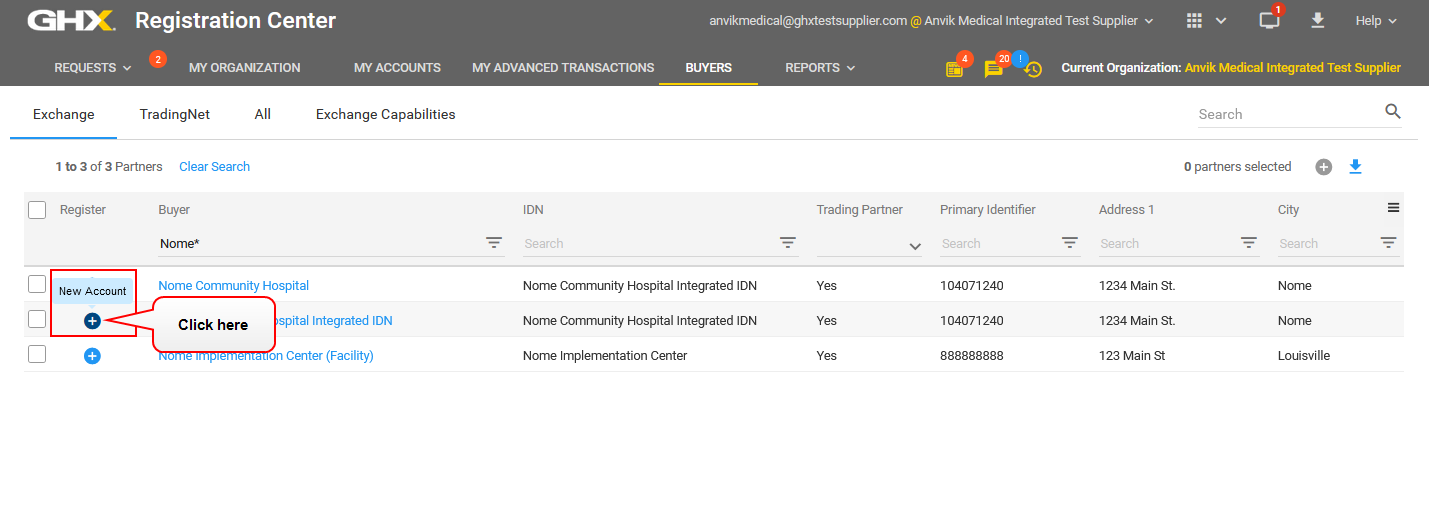
Click Buyers.

-
Click the New Account
 icon to the left of the buyer name. The Add New Accounts dialog box opens.
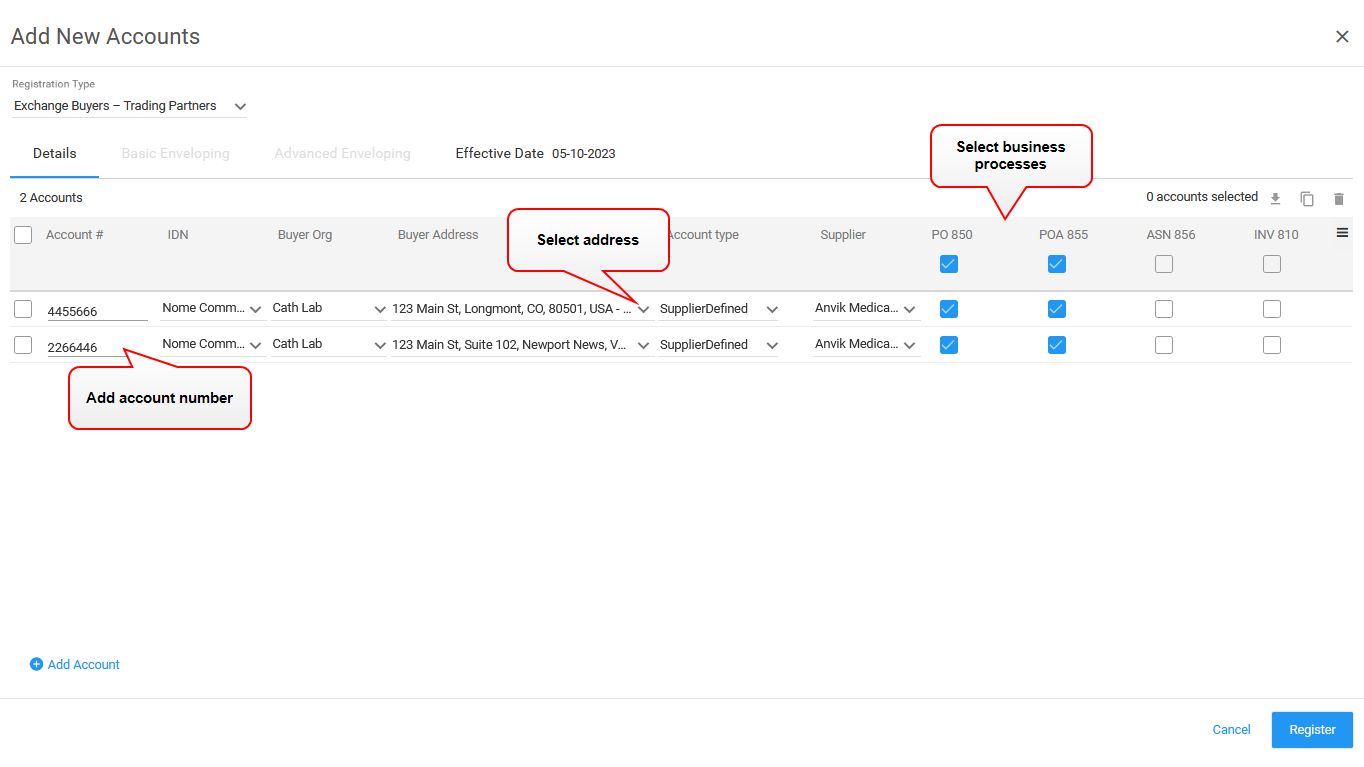
- Select an option from the Registration Type list. Options follow.
Option Description Exchange Buyers - Trading Partners Includes all integrated buyers on the GHX Exchange that have established business processes with the supplier. Exchange Buyers - Non-Partners Includes integrated buyers on the GHX Exchange that do not have established business processes with the supplier. All Exchange Buyers Includes all integrated buyers on the GHX Exchange. This is a combination of the trading partners and non-partners. WebConnect Buyers When the supplier organization subscribes to WebConnect, this selection includes non-integrated buyers that have established business processes with the supplier through the WebConnect solution. The WebConnect solution sends and receives EDI documents on behalf of the buyers. TradingNet Buyers - Trading Partners When the supplier organization subscribes to TradingNet, this selection includes non-integrated buyers that have established business processes with the buyer through the TradingNet solution. The TradingNet solution sends the partner EDI documents. TradingNet Buyers - Non-Partners When the supplier organization subscribes to TradingNet, this selection includes non-integrated buyers that do not have established business processes with the buyer but are available for trading through the TradingNet solution. All TradingNet Buyers Includes all buyers that are subscribed to the TradingNet solution. This is a combination of the trading partners and non-partners. - Type a number in the Account # field.
Note: When a buyer is unsure of the account number, and the selected supplier has enabled the "Allow Buyer to Request Account Numbers" capability, a secondary "Please Provide" checkbox displays to the left of the account number field. Buyers use this field to request that the supplier provide the actual account number.
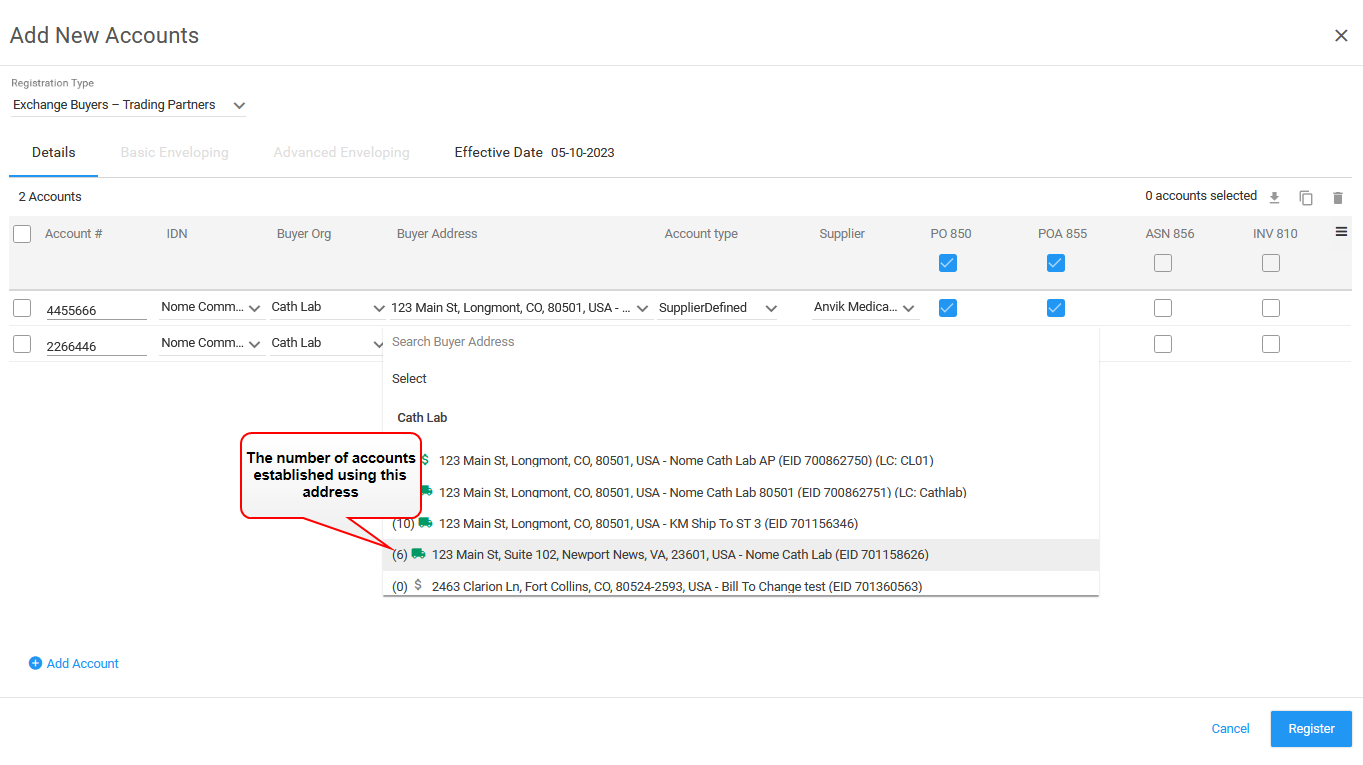
- Select an address from the list in the Buyer Address column.
Tip: For longer addresses that extend beyond the column, point to the address to view the entire address, including the EID, location codes (LC), GLN, and buyer-defined (BD) account that is assigned to this address.
The number in parenthesis to the left of the address indicates the number of accounts that were established using this address. (It may or may not indicate how active the account is.)

- Select an option in the Account type column.
- Select the checkboxes for the available business processes.
Note: When you select a PO 850, the system automatically selects the 855 because these processes are requested together.
Tip: Click the Add Account
 icon below the table to add another account using the same trading partner information that you just defined.
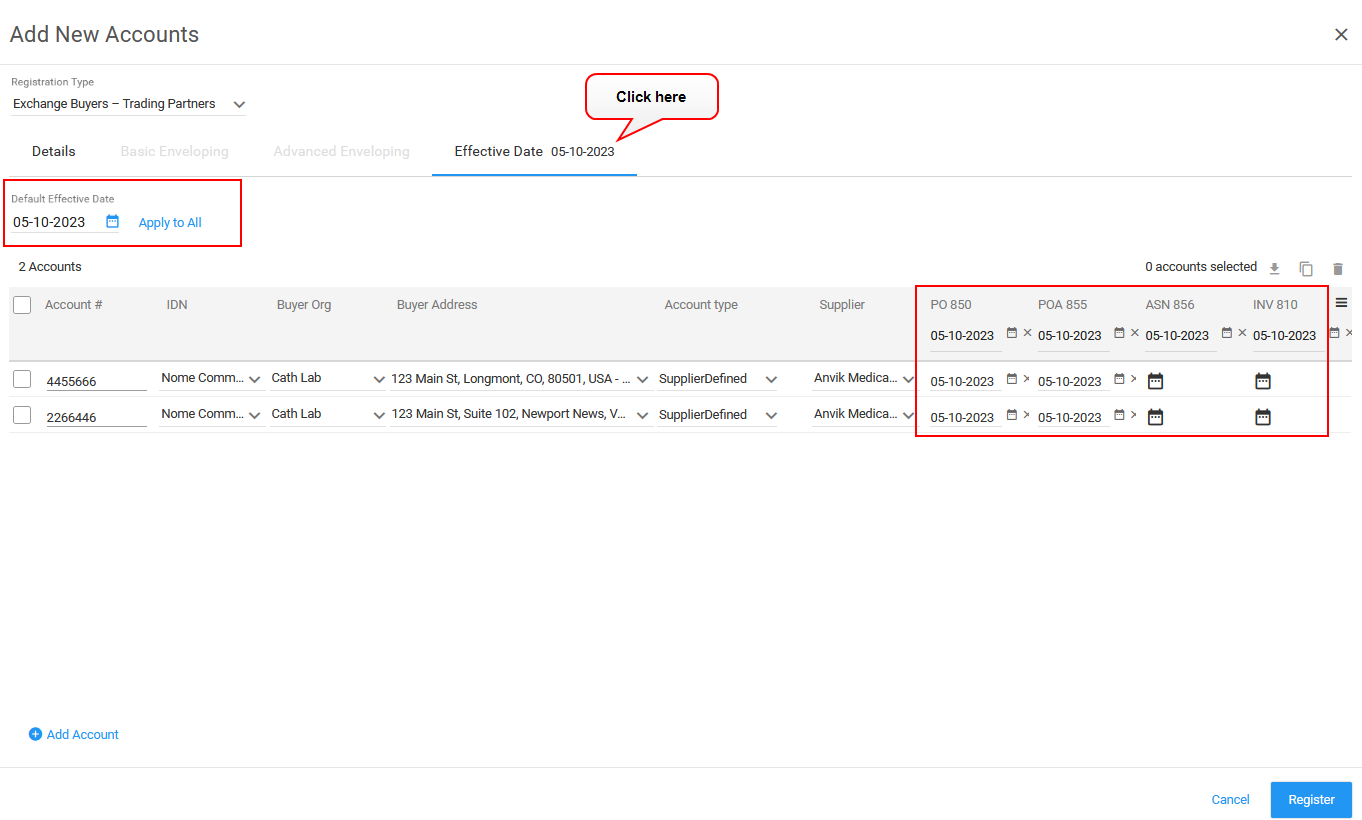
 - Click the Effective Date field to review the dates on which the new account will accept business process activity and modify that date, if needed. The default value is the current date.
Note: If your partner submits a transaction before the effective date, the transaction will fail on the Exchange. See Effective Dates for details.
 There are three ways to manage effective dates:
- Globally – Sets the effective date for all requested business processes
- By business process category – Sets the effective date for all the specified, requested business processes (for example, purchase orders)
- By business process for a specific account – Allows the user to specify an effective date for a specific account and business process (for example, the purchase order business process for account ABC)

- Click Register. Registration Center sends the request to your trading partner and moves the request to a Pending Buyer status.
Tip: View registration requests by clicking the Pending Buyer link on the Requests page.