Export Data to a .csv File
- Click Invoices. The Invoices page opens.
- Use Quick Clicks, Work Lists, or Advanced Search to search for and filter the data.
- Click the checkbox to the left of invoices in the table to select them or click the checkbox in the column header to select all invoices in the search results.
Note: The maximum number of rows in the export is the same as the selected Rows per page.

- Click the
 icon. The Export dialog box opens.
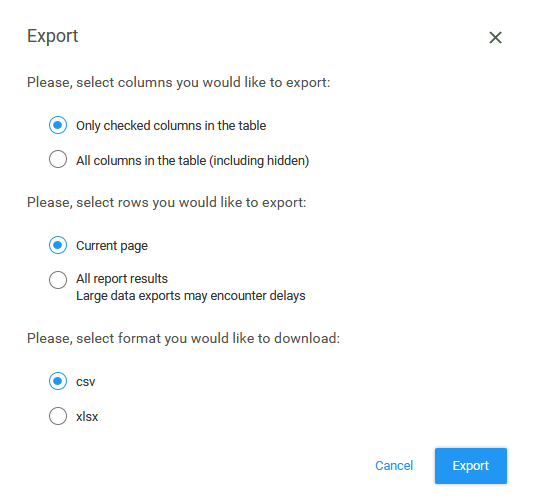
- Select a column option.
Options are:
- Only checked columns in the table: Select to include only those columns that you have selected from the Column select list (click the
 icon on the right side of the table heading)
 - All columns in the table (including hidden): Select to include all columns, including those that are currently hidden from view in the application
- Only checked columns in the table: Select to include only those columns that you have selected from the Column select list (click the
- Select a row option. These options are available when you click the checkbox in the column header, which selects all data.
Options are:
- Current page: Select to include the records from the current page; the maximum number of records is the same as the selected Rows per page (at the bottom of the search results)
- All report results: Select to include all records included in the report results, including those records not displayed on the first page of the search results
- Select a format option.
Options are:
- csv: Select to export the data as a .csv file
- xlsx: Select to export the data as a Microsoft Excel .xlsx file
- Click Export. A message opens.
Tip: The
 icon in the main menu indicates the number of files that are downloading and their progress.
 - Select a button on the message to open or save the file.
- Click OK. The application exports the information to a spreadsheet.