Add a New Power Sourcing File
You upload a new file to start the power sourcing process.
-
Create a source file with items that need to be enriched.
Note: See Power Sourcing File Requirements for a list of file requirements.
-
Open the Data ConnectContent Workbench, select Catalog Search, then select the Power Sourcing tab.
-
Select Add a New File. The Power Sourcing wizard opens.
-
Select Browse, navigate to and select the file, and select Open.
-
Select Upload File.
-
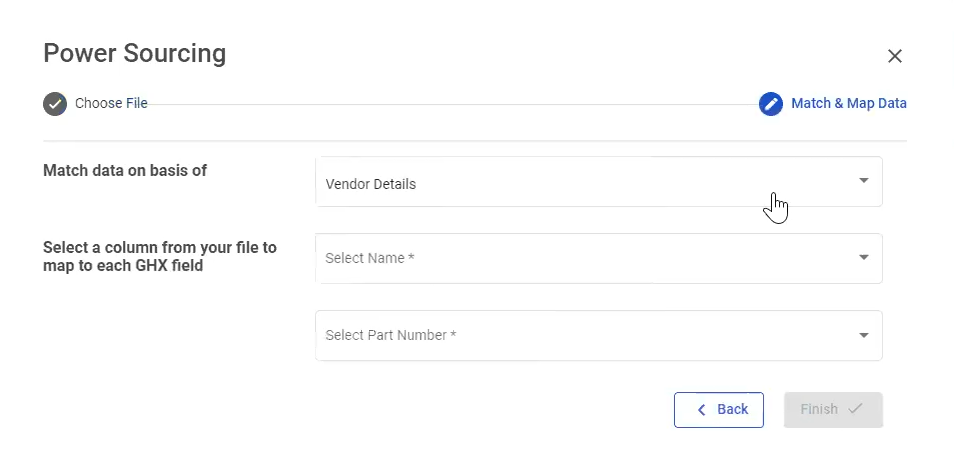
Select Next. The wizard opens the Match & Map Data tab.

-
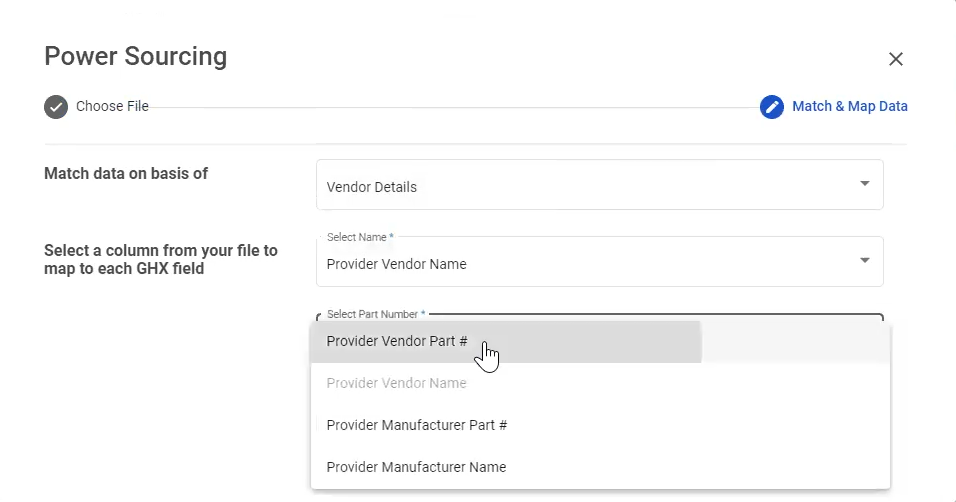
In the Match data on basis of drop-down list, select either Vendor Details or Manufacturer Details. These are GHX details. If you have a Manufacturer Name or a Vendor Name and the corresponding Part Number, then you can match it to either one of the GHX master catalog details. If you select Vendor Details, then select Name and Part Number. This instructs the application where to find the information within your input file.
-
In the Select a column from your file to map to each GHX field drop-down list, select the Name and Part Number options.
Note: Options are dependent on the information in the source file.

-
In the Select the output column drop-down list, select an output configuration. You can select an organization predefined view, which would be an output used by your entire organization, one of your favorites, or Adhoc, which means you can rearrange these attributes for a one-time output.
-
Select Finish. The output is generated and appears on the screen with a PS_ before the file name.
Tip: To see the latest status, select Refresh.
See Also
Power Sourcing File Requirements