Add Users
The Provider Admin user role has authority to add new users for the organization. You can add a single new user or import users in bulk. Use the steps below to add a single user.
Note: Users must update their password the first time they log in to eInvoicing for Providers.
- Click the Admin tab.
- Click the New User link. The Edit User page opens. Required fields are marked with an asterisk *.
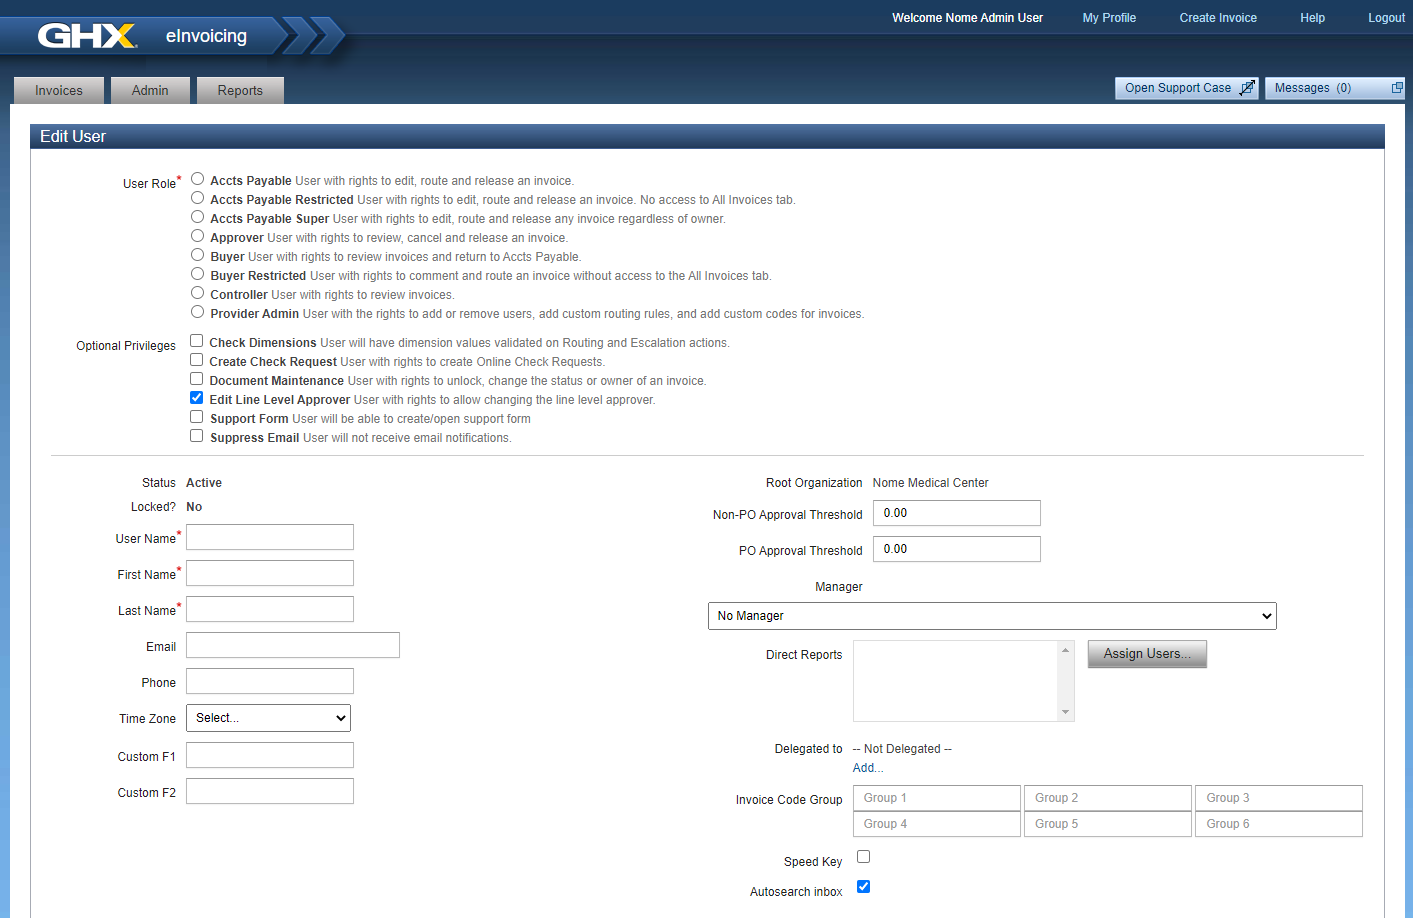
- Select the radio button next to the user role you want to assign.
See User Roles for information about the tasks each role can perform.
- Select optional privileges.
Options are:
Check Dimensions: Select to add a GL code (dimension) validation when the user routes or escalates any non-PO invoice
Create Check Request: Select to allow a user to create check requests (invoices) in the application; when enabled, the user will see a Create Invoice link in the top menu bar
Document Maintenance: Select to grant a user the ability to reopen submitted and closed invoices
Edit Line Level Approver: Select to allow a user to add and edit line level approvers
Support Form: Select to allow a user to open support cases with GHX Customer Care; when enabled, the user will see an Open Support Case button in the application
Suppress Email: Select to suppress new invoice email notifications from being sent to a user
Note: In most cases, users should continue to receive email notifications.
- Type a user name in the User Name field.
Note: GHX recommends using the user's email address as the user name.
Tip: You can also include the user's role in the field, which helps other users easily identify the user's role for routing or delegation.
- Type the user's first name in the First Name field.
- Type the user's last name in the Last Name field.
- Complete the following optional fields, if needed.
Optional fields:
Field Description Email
Contains the user's email address.
Phone Contains the user's phone number. Time Zone Contains a list of time zones. Custom F1 Contains up to 250 characters of custom information. Custom F2 Contains up to 250 characters of custom information. Non-PO Approval Threshold Identifies the maximum dollar amount this user may approve on non-PO invoices. PO Approval Threshold Identifies the maximum dollar amount this user may approve on PO invoices. Manager Identifies the approval authority. Managers are listed in alphabetical order by last name. Direct Reports Contains a list of users who report to a Provider Admin user. Delegated To Contains a list of users who have authority to temporarily act on behalf of this user. Invoice Code Group
See Assign Non-PO Code Groups for the steps to assign invoice code groups to user profiles.
- Select the Speed Key checkbox to enable speed key functionality when entering GL information (optional).
Note: Speed key functionality disables eInvoicing for Providers's type-ahead feature so that the system doesn't attempt to auto-fill general ledger data.
- Select the Autosearch inbox checkbox to give users the ability to search on the My Invoices tab. (The default setting for this checkbox is selected.)
- Select additional organization and vendor assignments, if needed.
- Click Save User.
See Assign Vendors to Users for the steps to assign organizations and vendors to user profiles.